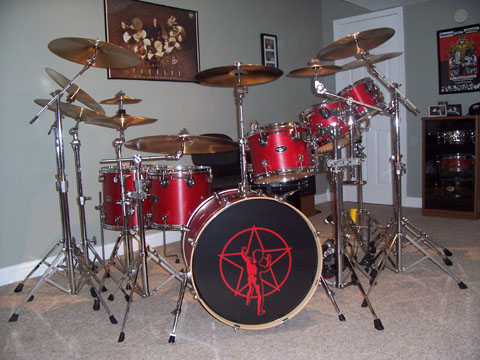
Paul Nuzzo's drum kit
Check out Paul Nuzzo's beautiful Pacific kit that was inspired by the S.S. Professor tour.
Read the story about how he configured his kit.
Reconfiguring the kit by Paul Nuzzo
I was inspired to reconfigure my kit after attending the S.S. Professor Tour. I originally thought it would be practically impossible to set-up my kit similar to Neil’s, but I am pleased with the result. Of course there are many differences between Neil’s kit and mine. Like many of my fellow drummers, I wish I had an extra $30,000 lying around to purchase the 30th Anniversary Kit replica. I guess I’ll have to wait to win the lottery before that dream comes true. For now, I’ll continue to enjoy my own little replica.
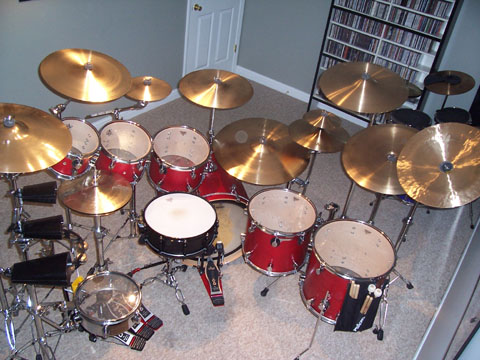
My drums are from the maple MX series by Pacific finished in a satin Deep Red. The tom dimensions are 7x8, 8x10, 9x12, 12x14, and 14x16. The bass drum is 18x22. The kit came with the matching Pacific 5x14 snare drum, but I rarely use it. My favorite snares are the 4.75x14 Noble & Cooley Classic Alloy (seen in pictures) and the 3.5x13 Black Panther Hammered Steel Piccolo Snare. I also just ordered a 6x14 DW Edge Snare in Red Ruby Glass with 24K Gold Hardware. This new drum will closely match the one Neil used on the Test for Echo and Vapor Trails Tours. I use Zildjian and Sabian cymbals with logos removed (exception: I keep the logos on the Paragon cymbals).
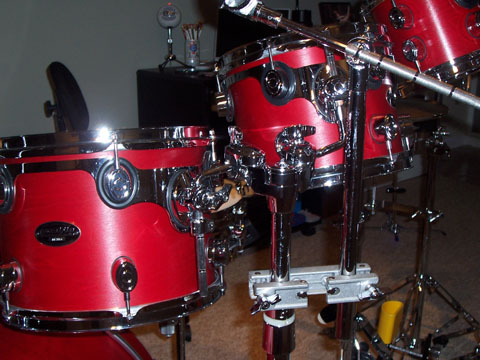
Trying to set-up my kit similar to Neil’s was a challenge in a few areas. One difficult area was trying to get the second and third toms set-up in a step fashion using one double tom stand. As the picture below shows, a simple downturn of one of the tom arms allowed for the third tom to be set lower than the second tom. It sounds easy, but it did take a little work to figure it out.
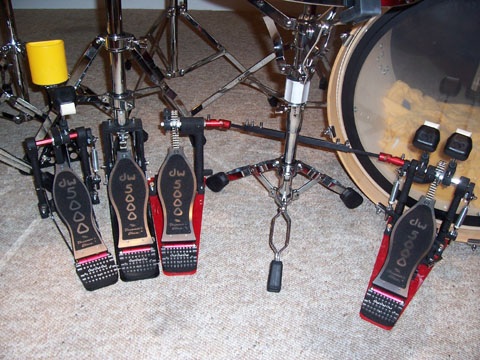
The other area of difficulty was trying to get the X-hat set-up with the 8-inch splash on top. I used a standard cymbal arm and added a Gibraltar Cymbal Stacker on top. I taped a large plastic cymbal sleeve onto the Cymbal Stacker so the top hi-hat cymbal would not rub against the metal shaft of the Cymbal Stacker. Other than those two challenges, it was rather easy to set things up. Like most Neil fans, I had many references (i.e., books, Internet, DVDs) to assist me along the way to make my kit look and operate as closely as possible to Neil’s. However, there are still many differences between our two kits. One of these differences is the clave pedal to the left of my hi-hat (see picture below); Neil has an electronic trigger pedal in that position. I usually have a small jam block, cowbell, or a tambourine attached to the clave pedal. I have found it to be a nice addition when playing songs like Animate or patterns similar to the Waltz section in Neil’s drum solo (See Neil’s Anatomy of a Drum Solo DVD for an explanation).
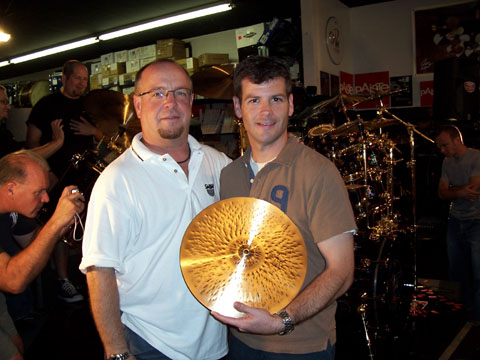
Since I started playing drums in the late 80’s, I’ve always tried to model some aspect of my drum set to Neil’s and that continues today with my current set-up. A major contributing factor to my current obsession is the fact that I won a cymbal autographed by Neil during the S.S. Professor Tour (see picture below of me with drum tech Lorne Wheaton). Since then I’ve been head-over-heels trying to create my own little replica. I realize it will never be identical to Neil’s, but I’ll keep adding and making changes. I love working and changing my set-up; it is just one of the many things that keep me motivated as drummer.Thanks for taking time to read about my kit.
All the best,
Paul Nuzzo